简介 在移动互联网场景下经常要用到服务器扩容,缩容的操作。管理众多的服务器,服务器之间的连接、配置都是一项很大的工作。如果有服务器宕机了,需要启动服务器去承担其工作。这种情况下,就需要k8s来帮忙搭建一套可伸缩的服务器体系。
环境搭建 一般都是使用minikuber来学习kubernetes知识。参考里面[2]有相关流程。我这里做一下笔记。
1 2 3 4 5 6 7 8 9 10 11 12 13 14 15 16 17 18 19 20 21 22 23 24 25 26 27 28 29 30 31 32 33 34 35 36 37 38 39 40 41 42 43 curl -LO https://storage.googleapis.com/minikube/releases/latest/minikube_latest_amd64.deb sudo dpkg -i minikube_latest_amd64.deb sudo usermod -aG docker $USER && newgrp docker minikube start $ minikube start * minikube v1.25.2 on Ubuntu 20.04 (amd64) * Automatically selected the docker driver * Starting control plane node minikube in cluster minikube * Pulling base image ... * Downloading Kubernetes v1.23.3 preload ... > preloaded-images-k8s-v17-v1...: 505.68 MiB / 505.68 MiB 100.00% 11.90 Mi > index.docker.io/kicbase/sta...: 379.06 MiB / 379.06 MiB 100.00% 2.87 MiB ! minikube was unable to download gcr.io/k8s-minikube/kicbase:v0.0.30, but successfully downloaded docker.io/kicbase/stable:v0.0.30 as a fallback image * Creating docker container (CPUs=2, Memory=2200MB) ... ! This container is having trouble accessing https://k8s.gcr.io * To pull new external images, you may need to configure a proxy: https://minikube.sigs.k8s.io/docs/reference/networking/proxy/ * Preparing Kubernetes v1.23.3 on Docker 20.10.12 ... - kubelet.housekeeping-interval=5m - Generating certificates and keys ... - Booting up control plane ... - Configuring RBAC rules ... * Verifying Kubernetes components... - Using image gcr.io/k8s-minikube/storage-provisioner:v5 * Enabled addons: default-storageclass, storage-provisioner * kubectl not found. If you need it, try: 'minikube kubectl -- get pods -A' * Done! kubectl is now configured to use "minikube" cluster and "default" namespace by default $ minikube dashboard * Enabling dashboard ... - Using image kubernetesui/metrics-scraper:v1.0.7 - Using image kubernetesui/dashboard:v2.3.1 * Verifying dashboard health ... * Launching proxy ... > kubectl.sha256: 64 B / 64 B [--------------------------] 100.00% ? p/s 0s > kubectl: 44.43 MiB / 44.43 MiB [-------------] 100.00% 15.70 MiB p/s 3.0s * Verifying proxy health ... * Opening http://127.0.0.1:38909/api/v1/namespaces/kubernetes-dashboard/services/http:kubernetes-dashboard:/proxy/ in your default browser... http://127.0.0.1:38909/api/v1/namespaces/kubernetes-dashboard/services/http:kubernetes-dashboard:/proxy/
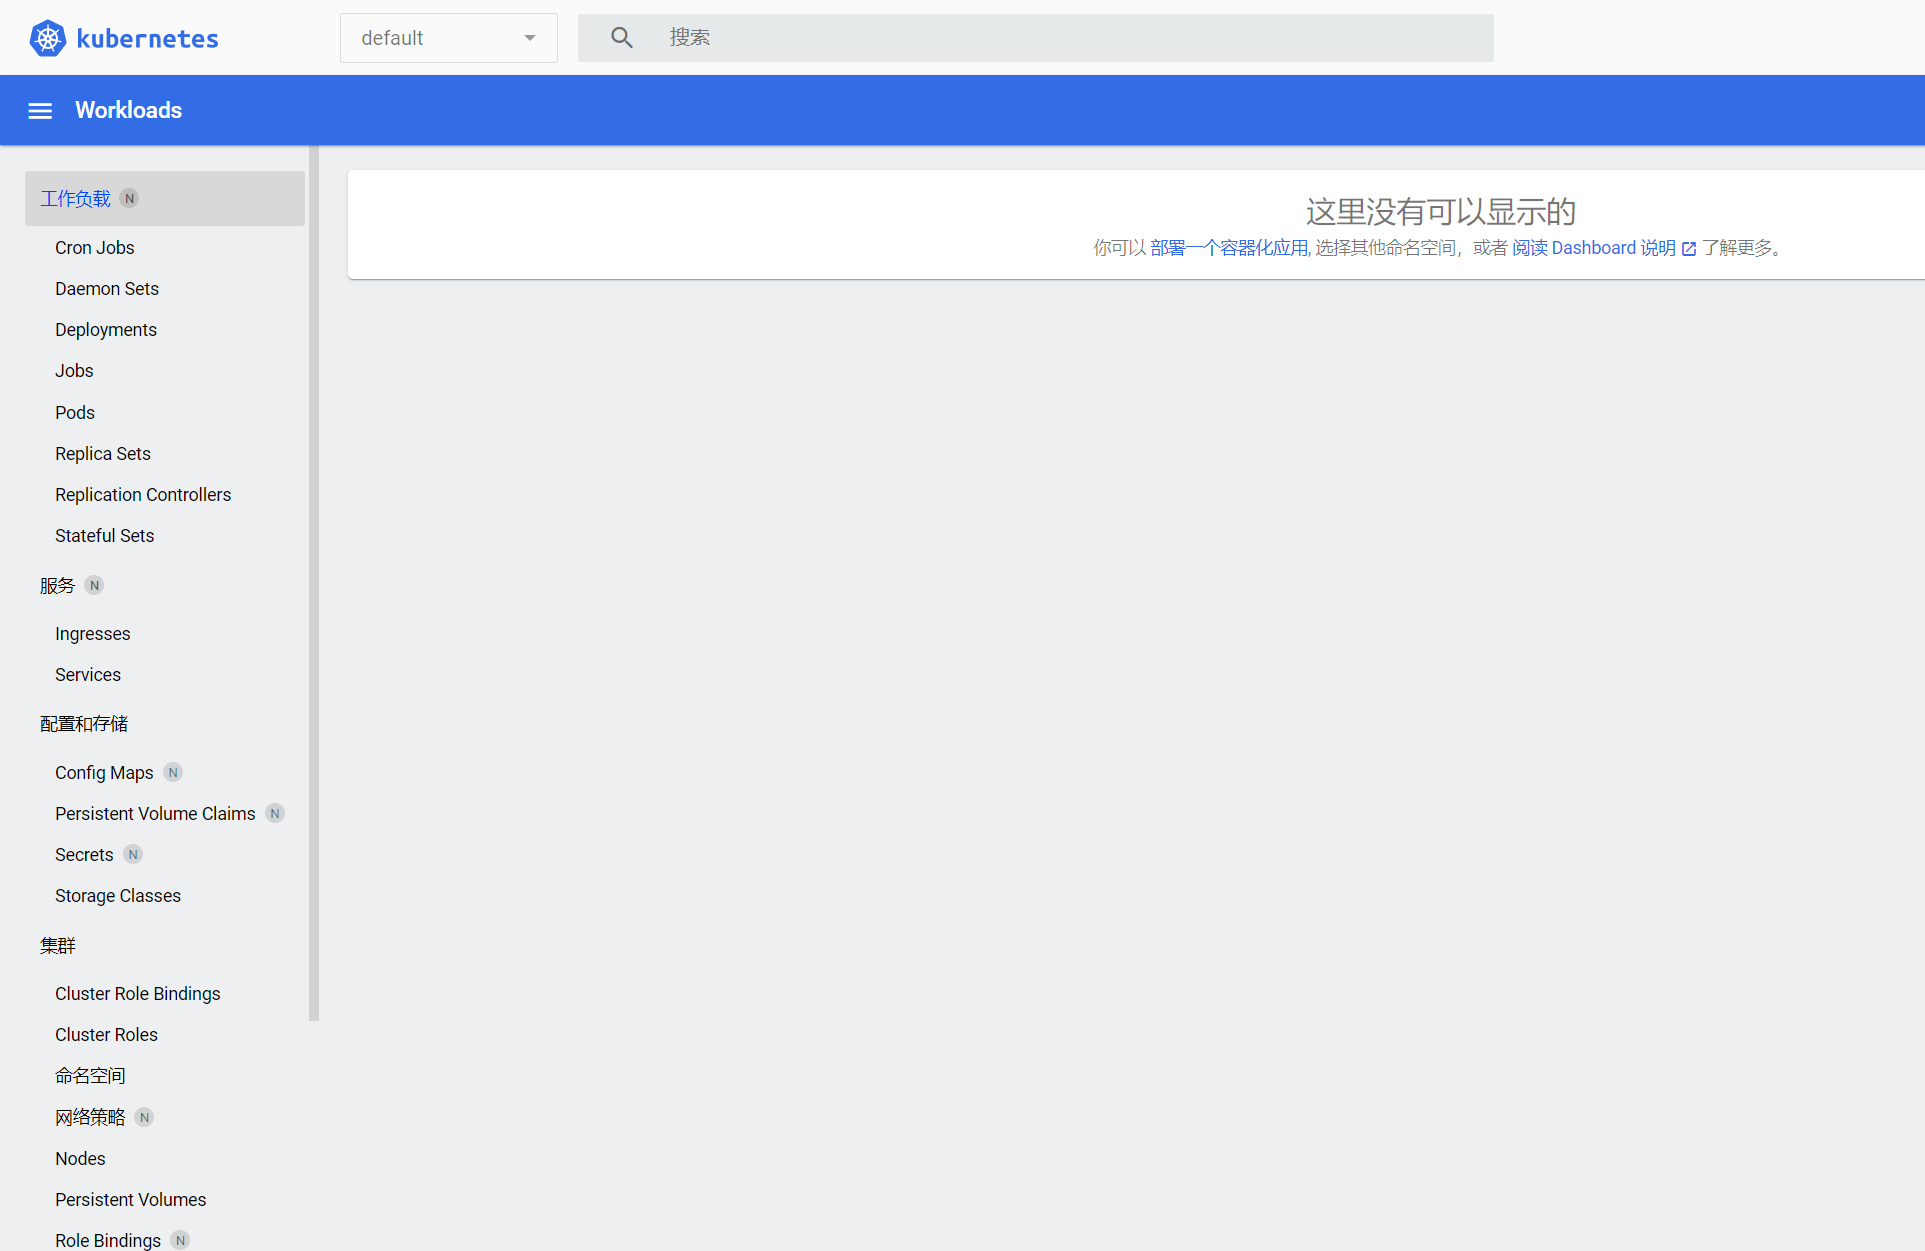
dashboard效果图
1
2
3
4
5
6
7
8
9
10
11
12
13
14
15
16
17
18
19
20
21
22
23
24
25
26
27
28
29
30
31
32
33
34
35
36
37
38
39
40
41
42
43
44
45
46
47
48
49
50
51
52
53
54
55
56
57
58
59
60
61
62
## 通过get po获取当前在运行的实例 $ minikube kubectl -- get po -A NAMESPACE NAME READY STATUS RESTARTS AGE kube-system coredns-64897985d-w6j2g 1/1 Running 0 10m kube-system etcd-minikube 1/1 Running 0 10m kube-system kube-apiserver-minikube 1/1 Running 0 10m kube-system kube-controller-manager-minikube 1/1 Running 0 10m kube-system kube-proxy-5m6b8 1/1 Running 0 10m kube-system kube-scheduler-minikube 1/1 Running 0 10m kube-system storage-provisioner 1/1 Running 1 (10m ago) 10m kubernetes-dashboard dashboard-metrics-scraper-58549894f-d8xgw 1/1 Running 0 5m29s kubernetes-dashboard kubernetes-dashboard-ccd587f44-xbb7v 1/1 Running 0 5m29s ## 为了方便直接创建一个简称指令 alias kubectl="minikube kubectl --" ## 通过指令创建一个应用 ➜ ~ kubectl create deployment hello-minikube --image=k8s.gcr.io/echoserver:1.4 deployment.apps/hello-minikube created ➜ ~ kubectl expose deployment hello-minikube --type=NodePort --port=8080 service/hello-minikube exposed ## 通过命令一直关注这个pods的变化 watch -n 1 minikube kubectl -- get pods ## minikube 启动一个web浏览器给你,用于访问这个服务 minikube service hello-minikube ## 将地址从容器里面转出来给本机使用 7080 就能去访问这个页面 kubectl port-forward service/hello-minikube 7080:8080 ## 负载均衡部署 kubectl create deployment balanced --image=k8s.gcr.io/echoserver:1.4 kubectl expose deployment balanced --type=LoadBalancer --port=8080 ## 打开另外的窗口,开启tunnel(隧道)提供给 balanced 部署做支持。 minikube tunnel ## 通过指令查询路由的外部ip kubectl get services balanced ## 管理集群 minikube pause minikube unpause minikube stop ## 设置内存上限 minikube config set memory 16384 ## 浏览 minikube addons list ## 在老版本的k8s里面创建第二个集群 minikube start -p aged --kubernetes-version=v1.16.1 ## 删除掉全部的集群 minikube delete --all
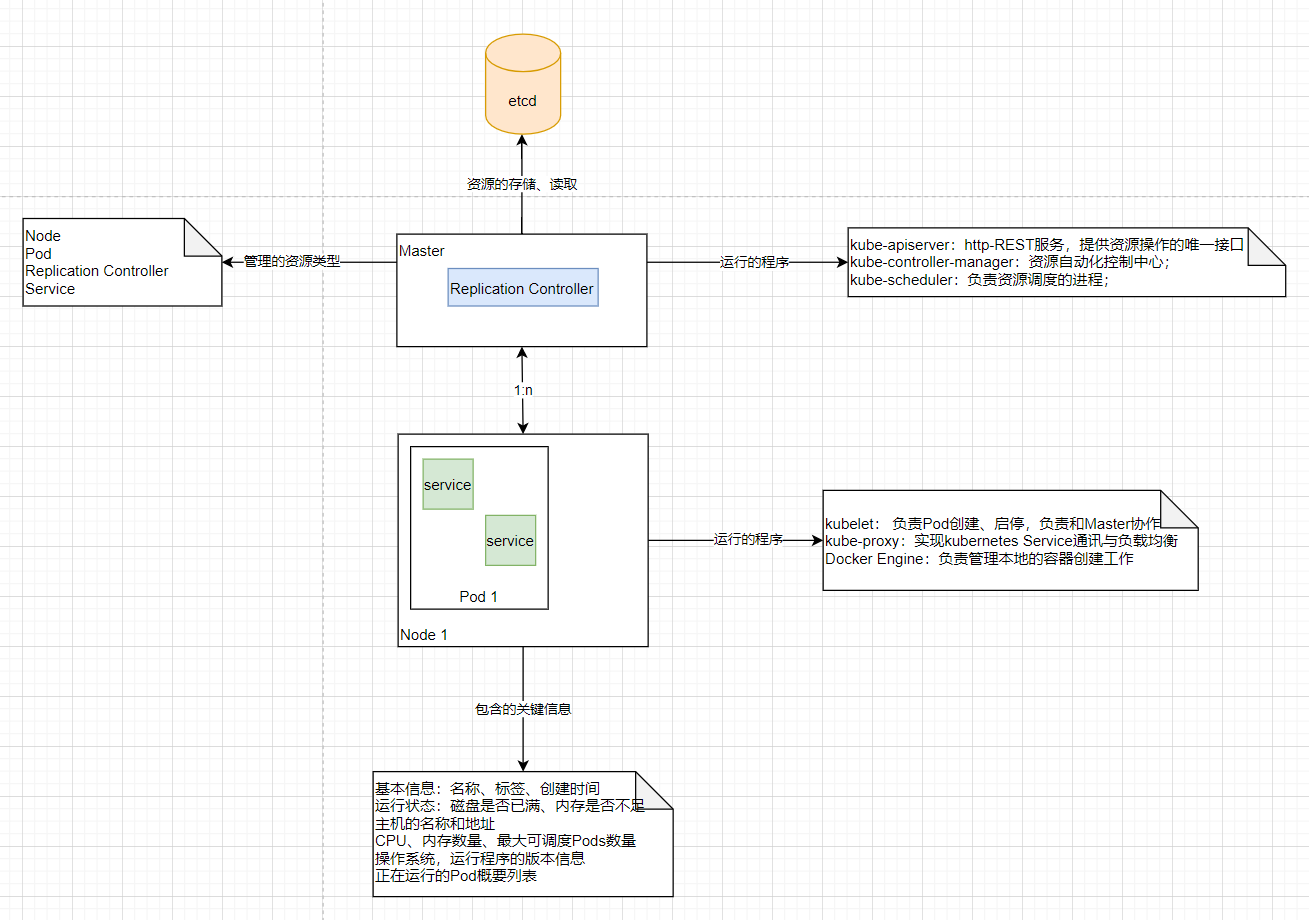
概念
Master Node Pod 杂项 安装过程中遇到的麻烦 1 2 3 4 5 6 7 8 9 10 11 12 13 14 15 16 17 18 19 20 21 22 23 24 25 -> # minikube start * minikube v1.25.2 on Ubuntu 20.04 (amd64) * Automatically selected the docker driver. Other choices: none, ssh * The "docker" driver should not be used with root privileges. * If you are running minikube within a VM, consider using --driver=none: * https://minikube.sigs.k8s.io/docs/reference/drivers/none/ X Exiting due to DRV_AS_ROOT: The "docker" driver should not be used with root privileges. ## 不要使用root运行 minikube $ minikube start * minikube v1.25.2 on Ubuntu 20.04 (amd64) * Unable to pick a default driver. Here is what was considered, in preference order: - docker: Not healthy: "docker version --format {{.Server.Os}}-{{.Server.Version}}" exit status 1: Got permission denied while trying to connect to the Docker daemon socket at unix:///var/run/docker.sock: Get http://%2Fvar%2Frun%2Fdocker.sock/v1.24/version: dial unix /var/run/docker.sock: connect: permission denied - docker: Suggestion: Add your user to the 'docker' group: 'sudo usermod -aG docker $USER && newgrp docker' <https://docs.docker.com/engine/install/linux-postinstall/> * Alternatively you could install one of these drivers: - kvm2: Not installed: exec: "virsh": executable file not found in $PATH - podman: Not installed: exec: "podman": executable file not found in $PATH - vmware: Not installed: exec: "docker-machine-driver-vmware": executable file not found in $PATH - virtualbox: Not installed: unable to find VBoxManage in $PATH X Exiting due to DRV_NOT_HEALTHY: Found driver(s) but none were healthy. See above for suggestions how to fix installed drivers. ## docker无法获取信息,也是权限不足 sudo usermod -aG docker $USER && newgrp docker
k8s使用类似 crontab相关的东西 how-to-run-a-cronjob-every-10-seconds
要让Kubernetes中的cronjob每分钟执行一次,请按照以下步骤操作:
编辑或创建cronjob.yaml文件,通过指定cron表达式来调度job的运行时间。下面是一个简单的示例:
1
2
3
4
5
6
7
8
9
10
11
12
13
14
15
16
17
18
19
20
apiVersion: batch/v1beta1 kind: CronJob metadata: name: my-cronjob spec: schedule: "* * * * *" jobTemplate: metadata: name: my-cronjob-job spec: template: metadata: name: my-cronjob-pod spec: containers: - name: my-container image: my-image command: ["/bin/sh" ] args: ["-c" , "echo Hello World" ]
可以直接使用utools来看看这个shedule还不知道如何。
使用kubectl create命令创建cronjob:
1 $ kubectl create -f ./cronjob.yaml
确保cronjob正常运行并检查job的日志:
1
2
3
$ kubectl get cronjobs $ kubectl get jobs $ kubectl logs <job-name>
如果需要更改cronjob的执行时间,请编辑cronjob.yaml文件并重新创建cronjob:
1 $ kubectl replace -f ./cronjob.yaml
k8s中域名的访问方式 1 2 3 4 5 6 7 8 9 10 11 12 13 14 15 16 17 18 19 20 本身的域名 cluster.local namespace shuwan shuwan.cluster.local service common common.shuwan.cluster.local pod common-0 common-0.common.shuwan.cluster.local same namespace somebody -> common common different namespace somebody -> maas.common common.maas
how-to-use-chatgpt-in-china
参考资料